Monday, April 25, 2011

The "J" Plane

One of the most ordered tools at Brese Plane is the small smoother that we've come to call the "J" plane. As I stop to think about why this is so, several things come quickly to mind to explain the popularity of this tool.

This plane fits the hands of a lot of different size people. I've had people of quite small size as well as woodworkers of quite large proportions pick up this plane and comment that it feels good in their hand. The rounded end if the plane presents a nice to place to grip this plane and keeps your hand from sliding forward and possibly pressing against the back of the iron which can crease uncomfortably into your hand.

The performance characteristics of this plane are well known. Many people have witnessed this plane working very difficult woods with and against the grain with relative ease. When confronted with a planing challenge, which happens frequently at WIA and the Lie-Nielsen Hand Tool Events where we show our wares, I will always reach for the "J" plane first. It has never let me down and once I've been successful with the "J" plane then I will attempt these difficult boards with some of the other planes on my bench. In other words, it's my "go to" plane.

The combination of the 55 degree bed angle, tight mouth and the unified mass that this plane creates is a winning configuration. Combine a well sharpened iron with the other aspects of this plane and the wood fibers have no choice but to shear and curl up. There's no magic, just solid mechanical elements that yield a result.

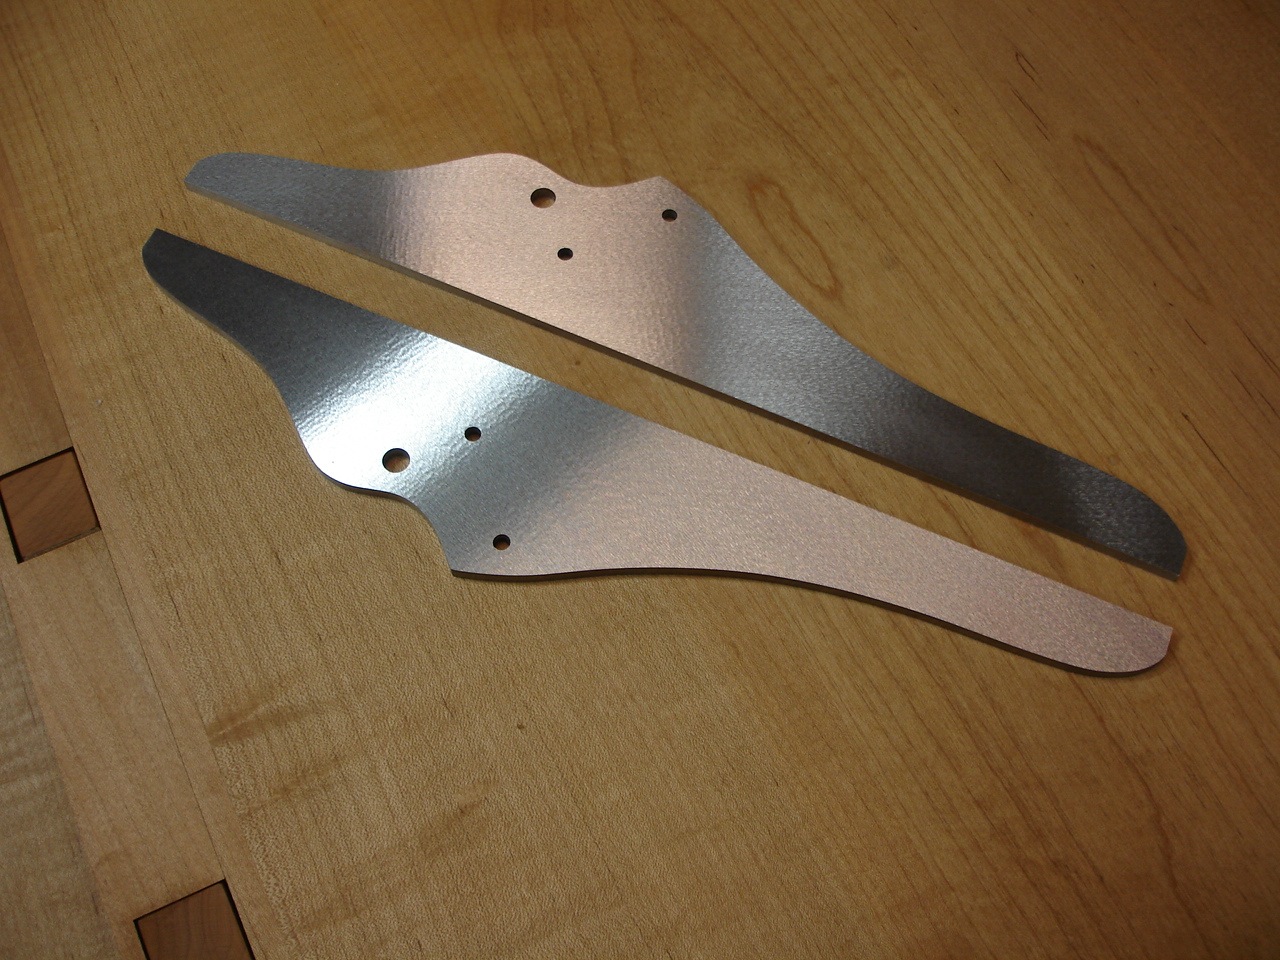
If you compare the picture at the top of this blog entry to the ones below you will notice that this plane has undergone some refinements over the past couple of years. None of these refinements has changed anything about the performance characteristics of this plane. I have reduced the weight in this tool a small amount and feel that the balance was improved by this change especially in regard to using the plane on the edges of boards and in places where the sole is not completely registered to the work piece. Almost all the other changes have been cosmetic.

I've changed to a stainless steel lever cap screws and a lower profile button on the iron that makes a handy back bevel registration point. If you're using the scary sharp method of honing the iron it's easy to place a piece of painters tape over this button, swipe it with a some paraffin and with the button placed off the abrasive you can easily impart about 1/2 to 1 degree of back bevel to the back side of the iron.

I also think that the price point of this tool has made it an attractive entry point for many people looking to delve into the world of infill planes. This plane is almost always ordered with rosewood infill. The color of the rosewood works well with the stainless and brass. I've actually been sort of yearning to make one with ebony infill, fortunately I recently received an order for this plane with ebony infill. I like a bit of a change once in a while.

I introduced this plane at the first Woodworking in American Conference in Berea, Kentucky. This event was also when I was first introduced to the hand tool woodworking community. I brought two "J" planes to the first WIA and at one point myself and a gentleman from Canada were making alternate passes from different directions on a piece of curly maple that contain some of the tightest curl you've every seen. This worked because one of us was left handed.

Since the first WIA in Berea I have been wonderfully supported by the hand tool woodworking community, Thanks Everyone!

Because of you I have more "J" planes to make. This makes me quite happy because as you know......."I sort of live for this stuff."

Ron


"If you're too opened minded your brains will fall out"


Sunday, April 17, 2011

The Last Equipment Upgrade for a Long Time!

Equipment acquisition is sometimes a wonderful way to increase your capabilities, efficiency and accuracy in your work. However it's not a decision made lightly. When you embark on an upgrade it typically involves a large amount of time and effort to research the purchase thoroughly and also to market and sell the equipment that is to be replaced.

For these reasons it almost always impacts your regular shop schedule in a negative way and creates a time period in which you'll put in long hours maintaining progress on the in process work occurring in the shop and then additional time in the evening setting up the new machine and preparing it to take over part of the work load
This latest upgrade has been one of the most challenging I've attempted to date. I know there's a guy with a beard in Cedar Rapids, Iowa that might want to argue this point, stating this machine did not have to be moved out of a basement during two rainy days. However the acquiring of the knee milling machine pictured in this post encompassed many structural and technical aspects that had not been issues in prior machinery additions. The picture above shows the mill fresh off the truck.


When I put the forks of the lift under the pallet and raised them I could feel the hydraulics of the lift straining to raise this load. The first thing that came into my mind was "what have I done?", immediately follow by a mental picture of this thing crashing thru the floor of my shop and onto the ground underneath. However I was too far into this to turn back. The truck driver had just completed a trip of 2200 miles with this mill on his truck and I don't think he would have taken very kindly to the idea of making a return trip.


To begin with this machine is massive. It weighs a good solid ton. Yep 2000 pounds. The biggest milling machine that I've handled prior to this one weighed 1000 pounds. Once you start acquiring machines that weight in excess of 600 pounds you're past the realm of thinking in terms of how many people you would need to move a given item. You've also passed into the realm of how do we move this thing without getting someone hurt. In this case I would be attempting to install this 2000 pound mill in a shop with a wooden structured floor so structural issues had to be dealt with prior to moving forward with this purchase.

I also knew that I would have to traverse an unpaved area to get to the load in door of my metal working shop. This was one part of the move that really concerned me, however it turned out to be one of easiest parts of moving the mill to the final location.

To actually set the mill into the shop it was removed from the pallet and held aloft under the ram of the head. I was very deliberate with this entire process. This was no place to get in a hurry. Finally it was in the shop. The person in the picture below is my friend Terry Sebright. He's not a big guy by any means, however seeing him in comparison to the mill you get an idea of the size of this machine.

The mill was moved into final position using a series of metal pipes and pry bars. At this point I'm just glad it's still on the correct side of the subfloor. Obviously my design of the floor shoring was up to the task.

There was still an enormous amount of work needed to get this mill up and running and finally 9 days after the truck arrived with the mill it has finally made it's first chips.

Even before this mill arrived it was scheduled for several upgrades. I'll be using a new tool holding system that is a series of collets that will allow me to change tooling in a fraction of the time this task has required in the past and there is not a major change required to go from milling to drilling.

In stock condition this mill achieves speed changes by moving the drive belt to different pulley positions. I have already upgraded this aspect. This mill now has digital speed control achieved thru a device know as a VFD or Variable Frequency Drive unit. This is one of the more technical aspects of this entire ordeal and required a good deal of research to sort out the wiring, installation and programming of this device. When it all worked I declared myself an "Electro-Magician".

There is one more major upgrade to be installed on this mill. It will receive a 3 axis digital readout system. This system will allow locations to be precisely positioned to within 2/10s of one thousandth of an inch.

Now that the machinery moving is over for a while I'm going to concentrate on posting more about the actual process of plane making and how these machines figure into the process and also about when the machine work stops and the hand work begins. Machines can do a lot of great work, however it's only when the human hand comes into the work that a certain look and feel is imparted to the item, and that will never change.

Ron

"Experience is the Name we give to our Mistakes"

Wednesday, March 30, 2011

A Screw Driver can be a Very Enjoyable Tool

Like most people I have a occasion to buy new tools for the shop and when I obtain a tool with which I am particularly impressed I like to share my joy of owning this tool or in this case a set of tools. When I have a need to fulfill I usually like to purchase tools from another independent tool maker such as myself. Bear in mind that when I write about other’s tools in this blog these are tools that I have sought out and purchased. I am not encouraged to promote other's tools and only do so of my own free will and most importantly if I think the tool is particularly worthy.

I pursue making fine tools on a daily basis and I know most of the people in the hand tool woodworking world that also produce products of a similar nature and quality so I’m not easily impressed. I now own a set of screw drivers with which I am very impressed.

I use screw drivers an awful lot. While sizing the height of the lever cap pivot pins for one of my planes I remove and install these slotted pivot pins several times and in the process of tuning the lever cap to the back of the plane iron I may remove and install the lever cap pivot pins several more times during this process, not to mention the many other occasions during the day that require the use of a screwdriver.

During the years that I made furniture I often wished for a good set of wooden handled screw drivers. I searched for this elusive tool and the best I could find was a set that I purchased from Garrett Wade. They had square wooden handles with a sprayed lacquer finish and even though they were better than the plastic variety they still left something to be desired. They were advertised as being made in Germany. They were not exactly the Mercedes of screwdrivers.

I continued to search and once I entered into making tools I often encouraged other tool makers that made small tools with turned handles to develop and offer a good set of screw drivers. Most of them looked at me like I had two heads and typically walked off mumbling something about how I had gone completely round the bend.

Thankfully waiting round the bend was Gary Benson, Dave Lindeman and Chuck Pyne of Elkhead Tools. They obviously also thought the world needed a better set of screw drivers because they have produced a set of tools that exceeded my wildest dream of what a set of screw drivers should be.

Cheap, poorly designed screw drivers are hard on your hands and most of them don’t fit the slots of common screw sizes well at all. When they slip they mark your work and this just creates more work for a plane maker. The Elkhead Tools drivers are an absolute pleasure and quite frankly every time I hold one in my hand I marvel at how they nestle in my palm and the feel of the cocobolo handles is just so enjoyable that I believe I unconsciously smile every time I pick one up.

I’ve waited a long time for a good set of screw drivers and these guys have obviously put a lot of effort into developing these tools. These tools consist of hand turned cocobolo handles, German tool steel shank and tip with brass ferrules integral of the handle insert that gives these screw drivers such a solid and well put together appearance and feel. The tips fit the slots of common size screws quite well and don’t ding and deform the edges of the screw head slots.

If you’re getting the idea that I like these tools you’d be correct. Let me say this however. These screw drivers are most likely a bit pricier, well actually a lot pricier than any set of screw drivers you’ve ever purchased but don’t worry you’ll be getting your money’s worth and you’ll know it every time you pick one up.

If you would like to learn more about these screw drivers and the other offerings by Elkhead Tools you can visit them online at www.elkheadtools.com

Once you've acquired this set of screw drivers you're going to need another set. Go right out to your local big box store and buy a complete set, maybe even two complete sets, of the yellow and black handle screw drivers. They'll probably be less than $10.00 for the whole set and then you'll be ready. Why you may ask. When your neighbor or brother in law comes calling wanting to borrow a screw driver you'll be ready. They most probably need it to open a can of paint and there is a better than even chance they will never return it. It will be well worth the ten or so dollars to keep harmony in the neighborhood and peace in the family.

Ron

Tuesday, March 8, 2011

A Plane Makers Dream, Billet of Macassar Ebony

I participated in the Altanta Lie-Nielsen Hand Tool Event February 18th and 19th at Peach State Lumber in Kennesaw, Georgia. This was a great opportunity to reconnect with some good friends from that area and see the good people from Lie-Nielsen Toolworks, my friend Deneb included. Steve Qhuel, owner of the local Woodcraft Franchise invited me to display and demo my planes on a beautiful ash Roubo bench made for him by my good friend Jameel Abraham. I just could not pass up that opportunity.

Some weeks prior to this event I received a phone call from a gentleman named John Fiant. John runs a custom woodworking/millwork business in the Marietta area of Atlanta. We conversed about several aspects of tools, tool making and many woodworking related topics. As the conversation ended we agreed that the Lie-Nielsen Event would be a great place to meet in person and continue our discussion.

John introduced himself to me at the event and as our conversation continued he inquired as to whether I would be interest in a piece of Macassar Ebony that he had in his possession. As he began to describe the piece to me I had to work at controlling my excitement. I certainly did not want to give away my bargaining position by seeming overly interested. The truth of the matter was just this....if the wood was as he described, I by all means wanted it and I told him so. So much for my bargaining position.

This billet measures 5" thick 6.5" wide and is 52" long. The moisture content measured 6.2% on all four sides. Truly a magnificent piece of very dense, will sink in water, piece of wood.

As you can see in the pictures some sides contained wonderful tight contrasting stripes and other sides contained contrasting marbling. John delivered this billet to my shop the following Thursday. When he place this piece on my workbench there was only one word to describe my condition......I was GOBSMACKED!! Seriously this was the word that popped into my mind.

A piece of wood of this nature doesn't come along everyday and I really was interested to know more about it's origins. I consulted with a friend that handles rare woods in the Atlanta area and he stated that he knew of some billets of Macassar Ebony of this description that had originated from a dealer on the west coast and was fairly sure this was some of that same material. This would put this piece of ebony as having been drying for 15 to 20 years.

By the time John departed for home I was the new owner of this wonderful piece of wood and of course my wallet was much lighter as a result. I was also in more trouble as well. When I consulted with the dealer in Atlanta he informed me that he had stumbled onto another log segment of the now famed "Picasso Rosewood". As luck would have it my wife Julie was flying to New York the next day to attend my Grandson's 1st birthday party. After I dropped her off at the airport I stopped by my local wood pusher, I mean dealer's place of business and entered into negotiations for the rosewood log. I returned home with the log segment rolling around in the trunk of my car like a bound and gagged kidnap victim.

It's been an expensive week to be a plane maker in this part of the world, but I'm thrilled to have this material.

While conversing with one of my customers on the phone the next day I mentioned this piece of wonderfully striped and marbled Macassar Ebony. He asked to me to send a picture. Negotiations of a different type ensued and when all was said and done it was agreed that I would be making a matched set of planes using the Macassar Ebony material.

A matched set of planes will be a new adventure for me and it goes right along with the adventure and the opportunity of acquiring exceptional wood. This piece of Ebony is so pristine in it's present form that it almost seems a shame to cut it up into pieces.........but I will!

Did I mention before that........ "I Live for this Stuff!"

Yeah, I guess I did. (Grin)

Ron

Friday, February 25, 2011

Shaping an Ebony Tote, or, Have you been Cleaning Out the Fireplace Again?


Obviously the rear tote is the first thing your hand touches when you pick up a plane and you will either immediately like the tool or you'll be indifferent about it. There's an old saying "you never get a second chance to make a first impression" and this holds very true to the rear tote of a hand plane. This is also the area in which you get all the feedback that the plane offers while in use. For this reason I spend an inordinate amount of time in the shaping the totes on my planes.

There are basically two types of totes. Closed totes and open totes. Open totes tend to be more upright and this makes sense because they are unsupported and need the more upright configuration to maintain structural integrity. The shape of a closed tote can be enhanced because it supports itself and this allows a more forward leaning shape that most find much more comfortable and inviting. In order to close the gap between iron and tote the even steeper pitched planes have an even more forward leaning shape and I find them the most comfortable.

I started first thing one morning with the tote already in the shape shown in the photo below. Roughly shaped, all the features that fit it to the plane body already in place, some of the areas rounded over. This particular tote will be part of a 132-50P stainless steel panel plane. I will use three tools to form the details of the shape I want to achieve. I start with an extremely sharp 1/2" chisel, you have to start sharp because it won't stay that way long while working ebony, a fairly course rasp, and a fine cabinet makers rasp. Both rasp are flat on one side and rounded on the other. This is critical for obvious reasons. You'll need to refresh the edge on the chisel several times during this process. When the chisel starts pulling out pieces instead of shearing it's time to hone.

I begin by blending the transitions from the rounded areas to the areas that remain somewhat flatter and I find that I can remove material much quicker at this stage of the process with the chisel.

As you start approaching the desired preliminary shape take lighter cuts with the chisel. This will allow you to refine the larger flat facets of the chisel cuts and make the shape much fairer.

Also note that I'm using the chisel with the bevel side against the surface I'm cutting. You can gauge the depth of the cut easier this way and it follows the contour. In the picture below you'll see that I'm making the radius of the neck of the stem deeper than it started. Some areas of the tote need to be shaped into a more elongated radius, I'll talk more about that later.

Next I shape the thumbnail at the top of the horn. It starts as shown in the picture below. You need a lot of control here so I do this with the finer of the cabinet makers rasp, and I find that I can achieve much better symmetry in the shape if I just move the rasp from my right to my left hand rather than moving the tote so as to work both sides with my dominant hand. Working left and right handed in some areas is just something you have to teach yourself to do. You'll find that it saves time and your perspective of your work piece doesn't change which is very helpful when trying to achieve a symmetrical shape.

The competed thumbnail shape at the top of the horn.

The process of refinement continues by working with the coarser rasp and continuing with the finer rasp as we approach the final shape. It's hard to show what a rasp really does in pictures so I decided to spare you those details. Below is the completed shape after shaping and sanding. I typically sand up to 600 grit and then use #0000 steel wool to polished the surface even further.

If you examine the picture below thoroughly you see that the radius of the neck has been expanded into a more elongated shape that accepts your hand in this area, almost asking you to hold the plane. The areas at the bottom of the main stem are also shaped into an elongated radius but here is where there are some minor differences.

The neck just under the horn needs to be shaped in a similar manner on both sides of the tote, however the area at the bottom of the stem should be shaped based on the approach of the hand. In other words if the user is right handed then that area will be more elongate on the right side or side of approach, the other side needs to be less elongated so that area of your smallest finger from the joint to the tip has an area to grip. This particular tote was made for a left handed user so it's shaped opposite that description.


Because this tote is for one of my stainless planes I have a little more leeway in the shape at the bottom of the tote. I did not have to work around the confines of the areas where the side pieces attach to the center section as is the case in one of my infills.

The next step is to apply the shellac polish. I apply the first coat as full strength two pound cut shellac which is allowed to dry and then flattened with 400 and 600 grit sandpaper followed by #0000 steel wool. Then I apply several coats of french polish which is subsequently rubbed down with steel wool and then buffed on a soft buffing wheel. This makes it look as satiny as it feels.

As I mentioned early I started first thing in the morning shaping this tote. It did not get the first coat of shellac until later than evening around 7:00 pm. It was a long day, my hands, shirt, pants and everything that was even close to the workbench that day was as black as coal.....and I loved it. If you haven't figured it out by now.....I sort of live for this stuff!


Ron


Wednesday, February 9, 2011

Oh My Aching Back, Legs, Arms, Shoulders, Neck, Etc.

1950's Era Covel surface grinder in the shop of the former owner.

Ironically it sometimes takes machinery to make hand tools to a very high level of fit and finish. Last year I purchased a small 6 x 12 surface grinder. Initially I used this tool to perform the surface grinding on my plane irons when they returned from the heat treating process, but as it usually goes once you have a tool and get acquainted with the way it works you find ways to use it to the best advantage in other areas of your work. This sometimes leads to the pursuit of a tool with increased capacity.

Craig's List has recently met my needs in this area, maybe a little too well. In the case of the 50's era Covel surface grinder that I recently purchased it seems as though it worked out beautifully. A nice piece of old iron, in good shape, at a very good price. When I went to look at this machine I made sure that my good friend and master machinist Johnny Kleso could accompany me for the inspection trip. The ad stated that the machine had been completely disassemble, cleaned, painted and all parts that needed replacement had in fact been replaced. I've traveled to inspect machines in the past in which the ad stated they had been completely refurbished, or were like new, only to arrive and find a machine that had paint over rust.

Johnny and I walked into the sellers shop to find a machine that looked to be nicely refurbished. Of course the spindle is the heart of the surface grinder and if it's not running true then the rest of the machine is not worth much. I switched on the machine, the spindle started up and was whisper quiet. Not so much as a shudder when it started. Cool!

There was however a catch. This machine weighed 1800 pounds and was in a basement with only stairs as the access. The picture below shows the surface grinder partially broken down in the basement of the sellers shop.

A deal was made and I set a date in which to retrieve the machine. The day before I was to fetch the surface grinder my good friend Jameel Abraham was arriving to spend the week, escaping the Iowa winter. As you can probably imagine this was no coincidence. When Jameel left Iowa Sunday morning it was 12 degrees, when he got off the plane in Atlanta that afternoon it was 72 degrees, the sun was shining and the sky was quite blue. Unfortunately the next day it rained and so we postponed the transport of the surface grinder until later in the week. We arrived in Decatur, Ga. Wednesday morning with a bag full of tools, a camera, and a bunch of ziplock bags that would be used to label and package hardware. We disassembled everything that two people could carry away from the grinder and packed those pieces in the truck and then spent a couple of hours putting together a strategy for handling the three heaviest castings. We arrived home that night about 7:30 tired from a long day and we still had the task of unloading the truck.

We estimated the base casting to weigh 600 pounds, the base cap casting about 500 pounds and the spindle column casting maybe 350 pounds. A plan is needed to handle pieces of this magnitude safely, especially with the limited space in which to move these pieces. Things this heavy go down steps much easier than they go up steps.

The next morning we returned and unstacked the castings using a come-a-long hanging from a floor joist in the basement and lowered them onto a heavy caster that we then wheeled out the door. We made a ramp on the steps using a piece of 3/4" plywood. We tugged the pieces up the ramp with the come-a-long that was anchored to the base of a shrub that had been in place over a decade. No shrubs were injured in the moving of this machine, there was however a patch of oregano that took a pretty good beating from the foot traffic.

We wheeled the pieces around the house to the driveway to load them into the truck and that's when it started sleeting. The sleet turned into rain while we were loading the pieces into the truck with the help of an engine hoist. Luckily the areas of raw cast iron were well oiled, you can see the rain beading up on the oil in the picture below.

We were able to get all the parts in the truck, it was still raining and we were cold, tired, sore and wet. We headed home.

When we arrived home the first order of business was to take some Tylenol, the second order of business was to eat the burgers and fries that my wife Julie had waiting on us and the third order of business was to once again pull on our wet, cold gloves and unload the truck. Without the assistance of the young man pictured below using the engine hoist to remove the last piece from the truck, this machine would have not made it to my shop in any reasonable amount of time. Thanks Jameel, I will be forever grateful.

By 10:30 that night all the pieces were unloaded. We dried all the surfaces with paper towels and a hair dryer and applied a new coat of oil to the bare cast iron surfaces.

This picture was taken several days later and shows the machine fully reassembled and in my shop. This machine is truly massive and truly amazing in performance. This old iron thing could get addictive. I keep telling myself, "stay off of Craig's List"," stay off of Craig's list."

When pursuing the acquisition of a machine of this nature it makes all the difference to have the help of knowledgeable people and friends like Johnny Kleso and Jameel Abraham.

"Thanks guys!"


Ron

Tuesday, January 25, 2011

Working Stainless, You Best be on Your Game


Mention stainless steel to most machinists and they look at you like you're some kind of sadist. If it's within your power to choose, why would you subject yourself to this kind of mental and physical abuse? The answer is simple, corrosion resistance. If you remember a couple of posts back I put a piece of 410 stainless on the door step of my shop exposed to the elements just to see if it would prove to be as corrosion resistant as claimed. The piece is still on the steps and for a week it was frozen in a block of ice, courtesy of the unusual winter storm that came thru a couple of weeks ago. The ice melted and the piece looks just as it did the day I put it out for the torture of mother nature.

The stainless does however live up to a reputation for being difficult to work. You'll go thru more tooling than with any other metal and cutting lubrication is an essential key to being successful with this material. Drilling is an area of much concern. You can work harden this material in the bat of an eye and once this occurs your only recovery will be with carbide tooling, however it's really just a better idea to avoid this occurrence. Sometimes it's just not within an acceptable design parameter to remove a few more thousandths with the carbide tooling so working hardening can also mean scrap parts and if this part happens to be a plane side that is match milled to the other side it could mean scrap parts time two. When one considers that precision ground 410 stainless is typically priced three times what you would expect to pay for mild steel....well, it can get expensive real quick. You learn that it's cheaper to pitch the drill bit that you're not really sure about rather than create stainless scrap. The trade off is evident a $4.00 drill bit versus a $135.00 stainless bar.

There is also a considerable amount of irony in working 410 stainless. In the photo above you'll see that one of the planes sides has been refined by removing the milling marks from the edge, and the piece in the background awaits this process. 410 stainless is formulated to be" wear resistant" so when you working an edge to remove the milling marks it comes to mind that you are trying to wear material that is "wear resistant." You can't think about this for very long because the idea of it will make you weary. As a comparison, anything that you can do in brass that requires 10 minutes of work will take 1 1/2 to 2 hours in stainless. Once again don't think about this too long or you'll go completely off the idea of corrosion resistance plane bodies.


I will have to say that milling 410 stainless with carbide end mills is a relatively easy task if you provide the cutter plenty of lubrication so it's not difficult in every aspect of fabrication but it will wear tooling at a much higher rate. It is not the easiest material to surface grind. I typically can get parts out of the mill at very close tolerances. It's pretty typical to achieve tolerances of .0005 on the width a plane sole in a length of 14" and that bit of inconsistency (if you would call .0005 an inconsistency) can be removed on the surface grinder if one wishes to do so.

Creating the stainless tweed pattern on the interior surface of the sole requires indicating every part when it is put into the vise and quite frankly what passes as precision ground bar these days usually isn't quite accurate enough to accommodate a milled texture that is only .002 deep in the surface. Therefore these pieces have to be reground here in the shop. The tweed pattern is a math/milling puzzle and attempting to assure that it is perfectly centered on the plane sole can drive a plane maker "round the bend."

The picture below shows the process of milling the tweed pattern, anyone can cut milling patterns in metal but to cut a milling pattern that has a holographic effect and looks like tweed fabric is a different thing altogether. It requires the correct starting point, the proper pitch of the overlap, the correct feed rate and depth of cut.


The picture below features two new additions to the shop. When attempting very precise work in demanding materials accurate working holding is very key. These two Glacern vises are very well made tools and are quite up to the task once they've been accurately set and indicated to the mill spindle and one to the other. I indicated these vise the same day I milled the stainless tweed pattern on two set of plane soles. Somedays you can just wear yourself out with math.

I certainly did not mean to post a gloom and doom of working stainless entry today. But sometimes a little insight into what's required to perform this work is helpful. I do believe the effort is worth the result. The stainless tools have a quality that is quite different in look and feel. The emphasis on very precise work in these tools is important in my effort to consistently create planes of this quality. Of course when all the pieces of a tool fit together quite precisely and solidly you have a plane that when in use.... nothing moves but the shaving. Include an iron with a quite sharp edge and wood fibers just don't have a chance.

My next post should show the final parts required before assembly of the plane body and the body assembled, that is unless I get off on another tangent. It's been know to happen. (grin)

Ron