Tuesday, January 31, 2017

Bench Legs and First Fit Up

The legs for this bench are obviously one of the unique design ideas. They are made from laminated pieces of maple and my intention all along was to apply some sort of painted and aged finish. But of course first the legs and stretchers would have to be glued up into assemblies.


These leg assemblies are the foundation for the bench and therefore they really need to be square.


While the leg assemblies were in the clamps on the bench they were at the optimal height to allow me to break all the sharp corners with a small plane.


The finishing process was laborious but the steps were actually quite simple.  I first applied a coat of Potting Bench Green solid exterior stain. This material looks a lot like milk paint. I lightly sanded all the surfaces after the first coat dried and applied another coat. The next day I rubbed the painted surfaces down with a maroon ScotchBrite pad. I then applied an oil pigments stain and wiped it lightly leaving enough color to give the paint an aged appearance. I then placed them in the garden house to let all the applied finish dry quite thoroughly and so the tacky finish wouldn't be exposed to the dust created while working on the other components of the bench. I let them be for nearly a week. I then brought them back into the shop and applied a thorough coat of finishing wax.


With the apron boards prepped, and with the leg vise details and holes drilled for assembly and work holding I was ready to do a first assembly fit up. 

Note, there are some wood movement issues in this design that have to be considered. There is a gap between the bottom of the apron boards and the bottom of the notch in the legs. The boards for the top of the bench will be glued to the edge of the apron boards so any expansion has to go downward. If this is the way you want it to move you've got to allow space. If the apron boards were against the bottom of the notch in the legs the apron board would lever upward when it expands and this would wreck havoc on the shape of the bench top.


Everything lined up as it should and so I turned my attention to processing the boards for the top of the bench. This meant hoisting more 8/4 maple timbers. I am once again reminded of why they call this "woodWORKING"

Ron

 "If you can dream it, you can do it. Always remember,  this whole thing was started with a
dream and a mouse."
– Walt Disney


Thursday, January 26, 2017

Back to the Bench

After Christmas I decided to turn my attention to the workbench project. The legs and the 8/4 soft maple lumber I had acquired for this project have been in the way and taking up a lot of space in the shop. Best possible solution was to go ahead and turn them into a bench that would be a usable tool in lieu of dealing with the clutter on a daily basis.

If you would like to refer to the first blog post on this bench build here is a link.

http://breseplane.blogspot.com/2016/05/personal-work-oh-no-not-another-bench.html

It explains the scope of the project and the reason I chose the Nicholson design. But now back to the build.

First off I needed to shorten the legs. Legs that are 5" square present a problem. I guess if you had a 12" mitre/chop saw you could use that to cut them to length. I even considered loading them up and taking a trip to Wyatt Childs Inc. (site of the FORP events) and cutting them to length on Bo's large sliding saw. After closer inspection and giving some thought to the problem, I decided that the legs were all quite accurate in length the way I received them from Osborne wood products, so all I really needed to do was accurately remove the part I didn't need in order to make them 32" long. I set a fence on my bandsaw, installed a new blade and an operation I thought would be a challenge turned out to be quite simple and easy.


The next order of operations was to cut the mortises for the stretchers. There are a myriad of ways to do this but frankly this bench project was between me and some other projects I have in the cue so I needed to do this quick and accurately. Besides when you're 63 years old you don't have as large an energy reserve as you did when you were 40, so my milling machine was a quick and easy to way quickly setup and cut these mortises.


I won't bore you with pictures or video of cutting tenons. If you're reading this you've probably cut a few and in many different ways. I made the shoulder cuts on the table saw and cut the cheeks on the bandsaw. Once again, "easy peasy!" The fit was exception and this allowed me to move the project forward at a quick pace.


The next order of operations was to process the 8/4 boards for the apron boards. I needed to notch the legs to accept these boards and I needed to know the final thickness of these components before notching the legs to accept the apron boards.


7 foot long 8/4 maple boards are not easy to handle and present a challenge just hefting them thru jointer operations and the like. I found it much easier to take the tool to the board in lieu of the board to the tool. I did work one surface of these boards thru my 12" jointer after knocking the high spots down with a hand plane. Thick timbers always seem to have a certain amount of twist and if it's not removed in the early stages of process it will remain a problem thru out the build.

The video below is an overview of several of the operations needed to prepare the apron boards.


After the legs were cut to length and the apron boards were processed I could proceed with the work on the legs.


You can see in the picture above, the legs are mortised, the thru hole for the BenchCrafted Classic leg vise is drilled and the mortise for the BenchCrafted CrissCross is milled. I made both cuts for the notch to received the apron boards on the bandsaw.

Many will wonder why I purchased the legs already turned from Osborne Wood Products. Frankly the blanks to turn the legs would have cost as much as the already turned pieces. Like I said I have other projects in the cue and a bench project is already a large task. Ready turned legs sent the project forward at a much faster pace.

Ron

"When you're dead you won't even know you're dead. It's a pain only felt by others.

Same thing when you're stupid."      (unknown)

Thursday, January 12, 2017

Last two planes of 2016


I completed the last two planes of 2016 in December. A Willie Davis style Winter Smoother with Olive wood. One of my favorite combination of materials.


The Olive wood in this plane is finished with a couple coats of shellac polish and then several coats of True Oil Finish. The Olive benefits color wise from the garnet shellac finish. It enhances the amber color of the wood. Olive being an oily wood needs to be sealed before the application of an oil finish, so the shellac serves a two fold purpose.


Hopefully the Tru Oil will help the durability of the finish. In a hand tool situation shellac has a reputation of not being very durable. Hopefully the addition of the oil will increase durability.


The final plane was a Winter Panel plane with a 440c stainless steel body and Macassar Ebony tote and knob.


In the past when I've combined Macassar Ebony with stainless or a steel bodied plane I've applied a patina'd finish to the brass. In this case the customer wanted the brass left to a satin sheen and finished with oil.


The finish on the wooden bits is True Oil. Macassar Ebony is not as oily as many exotics and therefore it takes the oil finish quite favorably and dries quite readily.


In preparation for the oil finish the surfaces are sanded to 400 grit and the first coats of oil are wet sanded into the material with the same 400 grit. The next coat is wet sanded with 600 grit. Subsequent coats are then steeled wooled between coats of finish. Once cured the surfaces are buffed to a nice satin sheen. The end results feels very nice in the hand.

This was the year in which we get all the kids and grandkids for Christmas celebrations. As soon as the last plane was completed I busied myself with preparations for their arrival. Fun and mayhem all at once. It was great?

January of 2017 has me turning my attention back to the bench project that I mentioned a couple post back.

Ron

Tuesday, November 15, 2016

The latest "JR" plane

I've found that collaborating with other artisans is a very interesting way to work. Engraver Catharine Kennedy and I have been working on a kit of planes for John Rexroad and just last week we completed another of these planes that are engraved on the interior and exterior.


So how does this happen? I make all the metal parts, mask off the areas where the pieces must mate. I then send them to Catharine in upstate New York. She engraves the interior surfaces while handling the parts with great care. At this point there is no going back, so to speak. In other words we committed to the parts at hand and when the engraving on the interior is completed we are so vested in these parts from the standpoint of time, any ding or unwarranted scratch spells disaster. The handling of the parts gets tedious at this point much less engraving and performing subsequent operations.


When the parts return to me they are as pictured above. Now the ball is in my court. I have to handle the parts with the greatest care during the unmasking and assembly process. I see to all the peining, lapping and grinding the radius of the heel and toe to the points where the sides and sole meet coming to a perfect tangent point of sole curve to the curve where the side of the plane meets the sole. If that sounds complicated and involved..........well, if it was easy more people would be doing it.

I then send the completed plane body back to Catharine for her to perform the exterior engraving task, after which she sends the plane back to me yet again so that I can add the wooden bits and actually tune to the plane to working order. Finally comes the point when we get to hand it over to the customer.


An exquisite way to embellish a brass monogram.


And on this side a fully rigged sailing ship complete with sea gulls in the back ground.


I guess a plane that contains this much visual stimulation could well do with some good quality, yet mundane wood. In for a penny, in for pound. Nothing less than one of my best olive wood sets would do.


Considering that this is second of this series of planes you might expect that this plane would have less impact than the first. I have to admit I sort of expected that myself. Not so.  This larger plane has a presence that took me off guard when all the elements were assembled. I am not easily impressed and this one put a lump in my throat.

This being an all brass plane makes it a bit heftier than the standard version of this plane. This affects the working characteristics of this plane quite a lot. You just start it down the board and it pretty much does the rest. You just have to make sure you catch it at the end of the planing stroke. (grin)

I don't mean to emphasize the difficulty of the work, but rather that is what makes this work so interesting to us.

Ron

Ability is what you're capable of doing. Motivation determines what you do. Attitude determines how well you do it. Raymond Chandler


Wednesday, September 14, 2016

Clock Dials with Custom Typesetting are Now Available from Brese Plane


I've made two clocks that reside in our house and several others that reside in other people's homes. When woodworkers visit my home they always ask where I sourced the dials with the custom typesetting. On my clocks it's my name as the maker in the lower section of the dial.

Years ago when I was a full time furniture maker I was asked to display my work in conjunction with a local painter at the local Upson Arts Council Gallery. I was flattered but I was a commissioned furniture maker and everything I had made up to that point was bespoke. Where would I get pieces to exhibit? Fortunately some of my customers offered to let me display their pieces and with a couple of new pieces I would have a nice presence in this event.

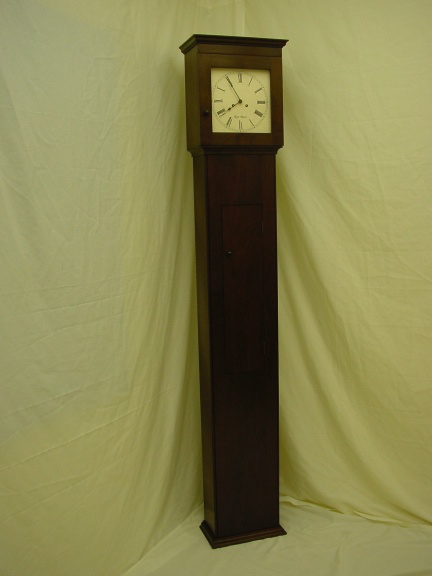
One of the new pieces I chose to make was my version of the Watervliet, tall case Shaker clock. I had been told when you make a speculative piece you should make something you would like to have because you just might end up with it.


Julie and I were in the process of designing our house and the clock was something that appealed to both of us. We designed a place for such a clock right between two windows in what was to be the parlor of the new house.


Long story short, the clock did not sell at the gallery event but did sell subsequent to the event and my lovely spouse was not pleased that the clock she thought would be gracing the parlor of her new home sold. Fortunately I made a duplicate clock 5 years later.

To make the clock I had to obtain the clock movement and dial. I actually purchased a metal dial that was a reproduction of a Shaker Wall clock dial including the date 1840. When I received the dial a couple things were wrong. (1) The outer edge of the dial was terribly out of square and putting that dial in a clock that I was making with the date 1840 on the face was just an absurd idea. So I searched for another alternative.


At that time there was a gentleman in Marietta, GA. named Larry Petro. He had a business called Old Tyme Clocks. He also had an online business where he marketed his paper clock dials. He printed these dials on very nice heavy card stock and offered custom type setting in two locations on the clock face. It was exactly what I was looking for and in subsequent years I ordered several clock dials from Larry.

I've made 2 clocks in the last couple years and unfortunately my source for custom clock dials is no longer in existence. I set about making my own faces for my clocks. This was quite a time consuming process but it was the only way to obtain a clock dial with custom text. Lately it's occurred to me that there are probably many people making clocks that would like to have custom dial faces for their clock project. Just recently I've decided to offer clock dials with custom typesetting on the face.

I'll begin this pursuit by offering the clock dial that is probably used more than any other. This style dial looks very nice in a Shaker clock case but is also very appropriate for many other style clocks. I will offer this dial in 5 sizes that also coordinate in size with easily available clock hand sizes.


The most common added text is the makers name in the lower dial position, however if you have a "brand" you might want to add that text in the top position as shown above.

The dial sizes are based on the diameter of the time ring and I will offer 5", 6", 7", 8" and 9" time ring diameter dials. The dials are printed on 12 x 18  heavy parchment card stock that will stand up to gluing and could serve as a pallet for an artist to hand paint these to a more elaborate design. If a different size time ring is desired, contact me,  I may be able to accommodate your request.

I'm offering the dials in 3 different variations of the parchment color. "White Parchment", "Natural Parchment" and what I'm guessing will be the most popular color "Aged Parchment".

White parchment

Natural Parchment


Aged Parchment


Also the text can be done in any of the 7 fonts shown below.


The base dial will be $33.00. For any dial with custom text in the Lower or Upper position, there will be a $14.00 add on. This cost will cover 2 lines of text in either position or both. Shipping will be $12.00 anywhere in the lower 48 states and international shipping will be actual shipping cost. Duplicate dials are available for an additional $18.00 each.

For instance if you order a dial with custom text the total would be $47.00 plus Shipping. An additional duplicate of that dial made and shipped together would only be an additional $18.00 with no additional shipping cost. (note the duplicate can be on different colored card stock)

The duplicate dial pricing will create some economy for people making multiple clocks. So if you're making clocks as gifts for all the kids this Christmas ordering the dials together could certainly reduce your overall cost.

See buy buttons at the bottom of the page. At this time you can only order the clock dials from this blog post, but soon there will also be a clock dial page on the Brese Plane web site, www.breseplane.com

I realize there are a lot of variable options for the clock dials so if you want to order clock dials but are unsure of how to order just send me an email and we'll sort out your particular needs. ronbrese@breseplane.com

CLOCK DIALS are NO LONGER AVAILABLE

If you are still unsure if you ordered your dial/dials correctly don't despair, I will contact you via email to verify the details of your order prior to printing.


The kid pictured above is August Brese Paglia, more commonly known as "Gus". At the particular moment this picture was taken he had claimed reign over the climbing rock at Greenwood playground in Brooklyn, NY. The shoes he was sporting are called his "Crock Flops" which I thought was a hilariously original name for his shoes. My Grandchildren crack me up!


Wednesday, August 17, 2016

Summer is Almost Over, Back to the Shop


The last post on this blog was about a workbench build I was about to commence. However Summer got in the way and the more I thought about it the less I wanted to start a major project during the hottest part of the year so I apologize for no updates regarding the bench. That is still to come when the weather is more conducive to hefting large bench members of maple.

Julie and I just returned from a 17 day stint in Brooklyn, NY where we supervised and assisted with the daily activities of our six and two year old grand boys while their parents traipsed over Italy, France and England. We were reminded why young adults have children. Kids that age have an abundance of energy.........we do not. All is well and we are back home. If you are one of our acquaintances in the Brooklyn area we apologize for not taking the time to visit during our stay. Frankly, we had our hands full and did well to cover the ground needed to make sure the boys got to all of their summer activities, not to mention the fact that we logged a lot of playground hours during our stay.

As summer draws to a close I am now turning my attention back to shop related work. I was distracted during these past warmer months by the myriad of projects that needed tending to in the yard. We have close to 3 acres and as great as that sounds it also has it downside. Upkeep on that much property can be a physical and financial burden at times. We've recently had 9 trees removed due to Beetle and lightning damage. Some of these trees were precariously placed and removal even by an expert was tedious at times, therefore this was a pricey endeavor.

I have been making some planes over the summer and at times I have taken the time to pursue some very different ideas. The Macassar Jack/Panel plane pictured below is one of those tangents I found myself on during the late spring-early summer time.

The multifaceted wedge makes for an interesting look and provides easier access for striking.


The brass wear shown below provides some wear resistance to an otherwise vulnerable part of the mouth


The brass strike button is actually mostly decorative. I found that I could reduce the depth of cut easily by tapping the top of the wedge.


This plane works quite well. In fact it exceeded my expectations in performance. My experience with wooden bodied planes during my furniture making career was that they were great on easy to plane materials, but when I needed to plane demanding hardwoods the lack of mass made them inadequate for that task and forced the user to work quite hard to keep them engaged in the cut. The mass afforded this plane by the Macassar Ebony body makes surfacing hardwoods quite an enjoyable task.

Another recently completed plane was the 650-55 "J" plane with Gabon Ebony infill. I've not made an infill for a while with most of my order list being populated by the Brute shooting plane, the Winter Smoother and Winter Panel planes. 


This little plane is a challenging build when you consider that the brass plane sides and the infill have to come together perfectly tangent to one another in four places around the opening in the plane. Two of those points are where a curve meets a straight line on the infill. Of course it's a fun challenge and one I've accomplished many times. The serial number on this plane was number 36.


Lately I've also been working on a new product offering which seems strange given that I am not taking new orders for planes. The reason is,  the new offering will not be a plane. In fact it will not be a tool at all.

Stay tuned. If we get a change in the weather I might actually make some progress on the bench build.

Ron


To the man who only has a hammer, everything he encounters begins to look like a nail.
—Abraham Maslow


Sunday, May 8, 2016

Personal Work, Oh No! Not Another Bench Build! and Why Everyone Needs a Beater Bench


Vise hardware from BenchCrafted, Exciting!

The worst mistake an independent tool maker will make is to get so involved in work for customers that he defers work on his own personal projects. The reason most of us went into our businesses is because we enjoyed woodworking. Next thing you know you are so engrossed in completing customer orders that you no longer get to enjoy woodworking for yourself. I'm trying to achieve a better balance of these factors in my life as of late.

 I've had what I call a "beater bench" in my shop since the first Woodworking in America at Berea College. I quickly fashioned a knock down, easy to transport bench for that event. The major requirement was the parts fit in the back of Bob Zajicek's Jeep Cherokee.

Then I decided to build the Shaker Bench that had been on my mind for quite a long time. You can see it in the pic below with a really wide pine board resting on the dead man and held in the leg vise.


After my Shaker bench was complete, the easy to transport bench became my "beater bench". Everyone needs a beater bench. The one that you don't think twice about performing task you would never consider doing on your good woodworking bench. I periodically need to cut pieces of psa back abrasive that fit precisely on different pieces of small brass sanding platens. I stick the platens to the psa side of the abrasive and trim in precisely with an exact knife. If I cut thru into the beater bench no big deal. Hey, it's a beater bench.

My beater bench has a BenchCrafted Wagon vise installed and this makes it enormously useful for all sorts of task. But alas, it sits right across from my Shaker bench and the beater bench..........well, it looks like a beater bench and it's one of the first things people see when they enter my shop.

I have no intentions of getting rid of my beater bench but I'd rather it not hold such a prominent place in my shop. I have an idea where it will be re-located but first I have to make a replacement bench.

So how did this start. Well "once upon a time" I was standing in my kitchen looking at our kitchen work island. It occurs to me that the island is just a workbench without vises and that turned legs would be incredibly unique on a workbench..........and the design wheels started turning.


The next thing that occurred to my bench designing mind was, like my Shaker bench, I wanted to design a bench that one person could build themselves. No massive glue ups that created large heavy panels that would require two people to handle safely. Smaller components would be assembled to accumulate into a massive bench structure that could subsequently be un-assembled for transport if need be.


Yes the legs I chose for my bench are massive. They need to be. It's a bench after all and I need the size to house the mortise for the leg vise criss cross device.

Another design consideration was "ease of build". I could design and build complex joinery into this bench configuration but once again, like the Shaker Bench, I want people to look at this bench and say to themselves, "this is nice looking, functional and I think I can build it." This is a design challenge for me that's intended to make the bench less challenging to build for others.

For instance I could design and build into this bench a massive dovetail joint where the end rail for the wagon vise meets the front edge of the bench top. Subsequently many would look at this bench and think, "I don't have the skill set to do that", which would put them off building a similar bench. 

Once again the design challenge here is to design a joint doable for the masses that is just as functional and easier to accomplish. I'm not trying to dumb down the bench design but to make it a more accessible design for the majority of woodworkers.

For this reason I've decided to build a Nicholson style bench. As of late most Nicholson bench designs have tended to be made as temporary, utility devices. Typically made from cheap home center materials, devoid of vises, mass and in general just a bench to get by until you have time to build the massive Roubo bench you've aspired to make at a later date, or a bench to facilitate making your ultimate bench.

My plan is to design and build a Nicholson style bench that is plenty massive, has some of the best work holding vises available, made from premium hardwood materials and will be a bench that one would be happy to use for the rest of their woodworking life.

Stay tuned, this could get interesting,

Ron


"A man's ego can be a cruel teacher"
                                                            Ted Lolley